|
|
|
|
|
|
|
|
|
|
|
|
|
|
|
|
The 'Uni-Quiver'
|
|
|
|
|
by Richard Christiansen (Tuffcity)
|
|
|
|
|
A friend of mine, who has a fondness for single shot rifles, has a theory that "any rifle designed to hold more than one round has a serious design flaw." While my favourite weapons are recurves and longbows I tend to agree with him on his theory, when applied to bow-mounted quivers. My personal preference is not to have a bunch of 'rounds' hanging off bow limbs but I also like the idea of having one close to hand. Thus began my quest for the single arrow quiver. I know that there is at least one big name bow company that sells these rigs but for the price, rate of currency exchange, and dealing with Customs I decided to have a go at building one myself.
It's actually quite a simple process and anyone with enough manual dexterity to thread a needle should able to make one.
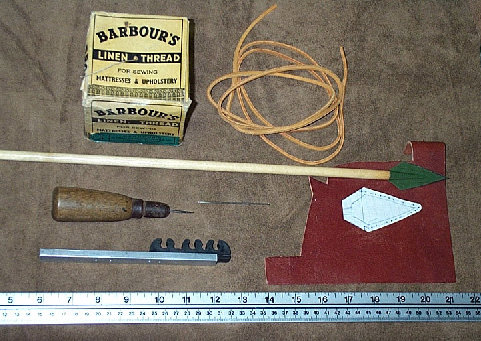
You will need:
· 2 pieces of leather bigger than your broadhead
· a piece of paper to draw a pattern on
· scissors or razor knife
· sharp pointy object to punch holes in leather with (awl or like-minded instrument)
· heavy thread (I used waxed Barbour's linen thread) & needle
· rubber insert from an old quiver (see photo)
· leather lace or piece of nylon chord (both optional)
|
|
|
|
|
|
|
|
|
|
|
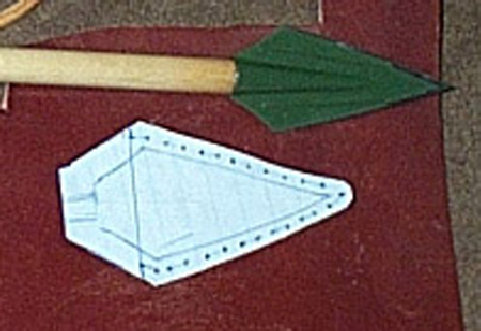
1. Trace the outline of a broadhead on a piece of paper, extending it past the back of the head, as shown in the picture below. Trace another pattern only this time stop at the widest point of the head and draw a line across. The second pattern is the top of the broadhead hood. Cut these pieces out at least a ¼ inch bigger than the drawn part (seam allowance). The top pattern should line up, size-wise, with the bottom pattern.
|
|
|
|
|
|
|
|
|

|
|
|
|
|
|
|
|
|
|
|
|
That's the hard part done.
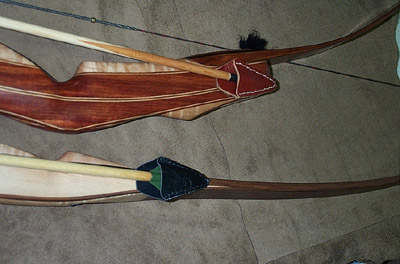
Take a broadhead equipped arrow and see if it fits securely in the hood. If it does, and you're happy with the result, glue the hood somewhere on the side of the riser or limb. Whatever you use to glue fletching on with should work, I used a gel adhesive on one bow and 2-sided tape (the type that is used to stick auto trim on) on the other and so far it has stayed on for over a year.
Act 2: the bottom part of the "quiver".
You can buy replacement parts for quivers that have the rubber 'arrow grippers' (for lack of the technical name) usually attached to a metal holder. Pull the rubber strip out of the metal part and cut off one section to hold a single arrow.
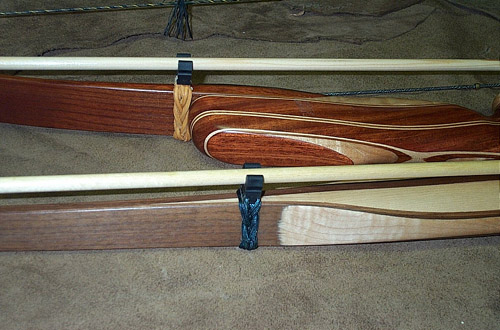
Now it can be as simple as epoxying a single rubber arrow clip to the limb or riser or fancy it up a bit by incorporating it into a decorative knot. Which is what the lace or chord is for. The glue used for fletching doesn't seem to adhere very well to rubber and the bow finish, so a better epoxy might be needed.
|
|
|
|
|
|
|
|
|
|
|
|
|
|
|
|
|
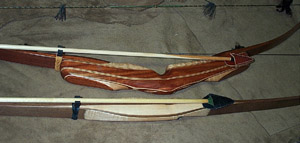
The longbow pictured has a clip held on by the wraps of a Turk's Head knot and the recurve has the clip lashed onto a Ring knot. (Fancy knots are another great time waster that I sometimes delve into.) The leather lace was used on the recurve and nylon chord for the longbow knot. Both of these knots can be built off bow then slipped over the limb, and they can be tightened up securely so that they won't slip on the limb.
And you're done.
|
|
|
|
|
|
|
|
|
|
|
|
|
|
|
|
|


