TUNING FOR TENS
Link to the Acrobat Form of T4T Link to Kindle MOBI format file EPub Version
 |
   |
 |
 |
||
| By Rick Stonebraker | ||
| Copyright 2000-2015 All Rights Reserved | ||
| A State Archery Association | ||
Foreword:
|
|
|---|---|
Section 1 |
Set plunger to rigid maximum depth by removing spring and replacing with wooden matchstick. NOTE: This step is the same for left-hand and right-hand archers. |
1A: |
|
 "Plunger" aka "Button" |
The PLUNGER has a SPRING inside to allow/buffer horizontal movement
of the arrow at release. Some plungers, such as the Beiter, allow you to screw the plunger spring down entirely, compressing it so that the plunger is entirely stiff and unmoving. You may choose to do this instead of using "insert a matchstick" method, as long as the plunger is made completely stiff (like a matchstick would do).
When tuned properly, the PLUNGER will prevent the arrow from moving in past center in case of a poor release. |
1B: |
|
 |
Remove the SPRING  from the PLUNGER, or else dial the Beiter clockwise to fully compress the spring until the plunger is completely stiff. from the PLUNGER, or else dial the Beiter clockwise to fully compress the spring until the plunger is completely stiff. |
1C: |
|
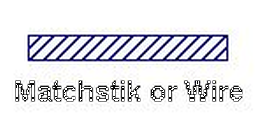 |
If the plunger cannot be adjusted to fully compress and make rigid the plunger, you will need a matchstick/wire to insert in place of the spring to make the plunger completely stiff and unmoving. |
1D: |
|
 |
Cut a wooden matchstick or a piece of wire about 3/4" long to use as an insert to make the plunger stiff and unmoving. The STIFF PLUNGER will help tune the arrow shaft. |
1E: Position Bow For Proper View |
|
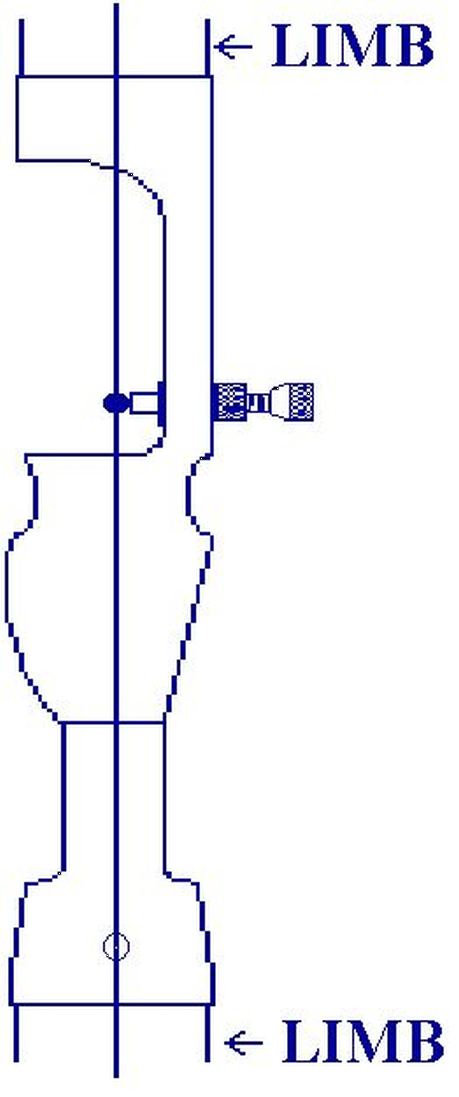 |
Install the STIFF PLUNGER into the riser to appropriate depth as shown, by adjusting the collar of the plunger.. For this step, remove the center stabilizer and sight if necessary. Put the bow in a stand, or lean the bow forward in a way that holds it still but does not cause the limbs to distort. The corner of a room, an empty chair, the cushions on a couch, etc. may be useful. As shown, the bowstring should be directly in line with the center of the limbs and the holes(if any) on the riser.If you discover the string does not align properly, use the manufacturer's manual to show how to adjust the limbs to aligh the string properly. In this diagram the dark circle on the string is how the arrow will appear when viewed directly from behind the nocking point. You need to be able to view your bow from this perspective. |
1F: Install/Adjust Plunger Position |
|
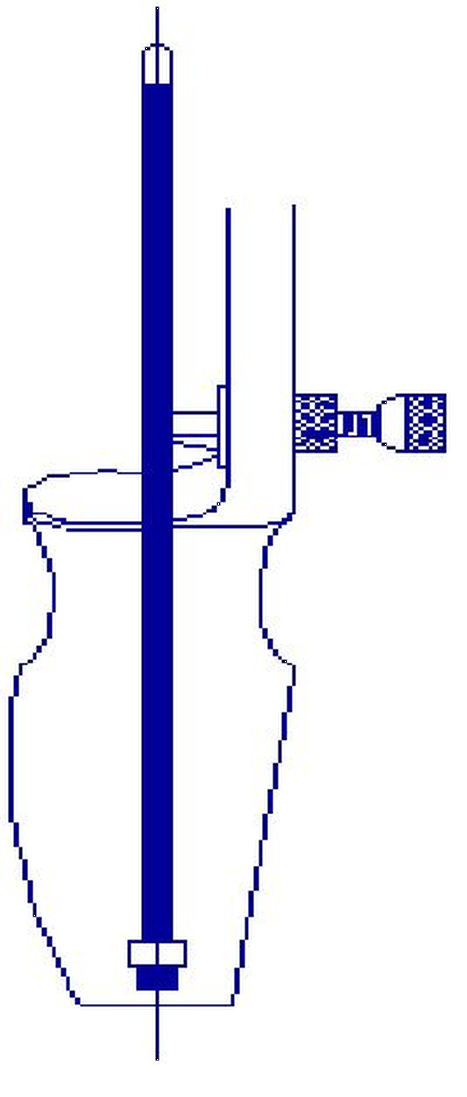 |
The arrow is shown as if from above for perspective,in this diagram with the middle of the bowstring right on line with the center/TIP of the arrow. Adjust your plunger depth in the riser until an arrow properly nocked on your bowstring is dead-center with the string, as in the diagram. Then, re-install the stabilizer and sight if removed in step 1E and your bow is ready to shoot, proceed to the next Section. |
SECTION 2: PAPER TUNE SETUP |
|
2A: This step will: |
|
|
WHY A BARE SHAFT? A bare shaft is an arrow with no vanes/fletchings to influence the arrow's behavior. It is a diagnostic tool every archer must use. If a bare shaft is shot at a short distance through a sheet of paper (and into the bale), it will reveal improper thrust effects since aerodynamics will not straighten out the flight path/angle of the arrow. A bare shaft may literally fly sideways through the paper, leaving an obvious strip torn through the paper, a tell-tale pattern of bad tune. If you shoot a fletched shaft instead, the paper tear will reveal very little, making this step in the tuning process more difficult. Shooting a fletched arrow through paper at short distances is of very little use in recurve tuning, compared to the method you will use herein. |
Bare Shaft: |
 |
| versus | |
Fletched Arrow: |
 |
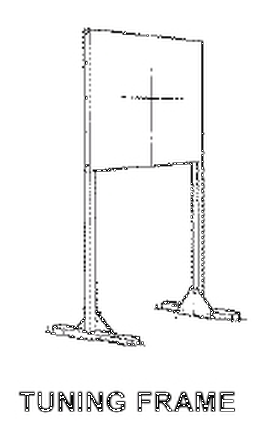
TUNING FRAME:The tuning frame consists of a frame, usually wooden or pvc pipe, which holds paper flat and secure at an appropriate height for the height of the archer, in front of the target matt. It is best to have at least 3 bare shafts for best diagnostics of consistency. The paper can be tissue, newspaper, paper bag, or butcher paper. It must be thin enough to tear cleanly and large enough to fit the frame. Rolls of white paper from office supply stores (butcher paper) are often incorporated into the design to allow easy "fresh" paper to be placed and held in position with clothespins. Each shaft must be shot into a space of un-torn paper. |
 |
2B: METHOD |
|
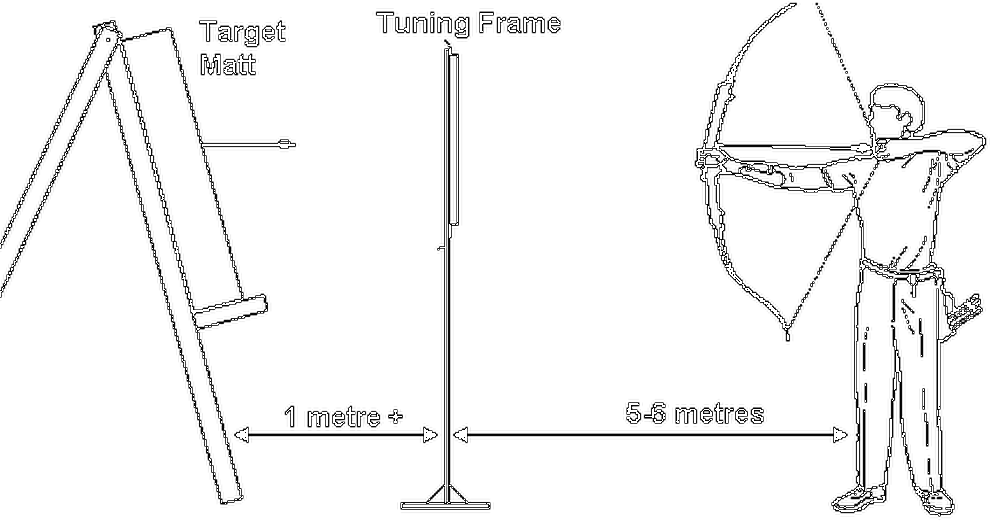
| NOW, the nock point must be confirmed to be at the proper location on the bowstring first. The thrust of the bow's limbs must not push the arrow up or down, but rather perfectly straight in the center of the arrow and through the paper. Note that the paper will likely tear from side to side, but there must be no vertical element in the tear in the paper when you are done with section 3. Review the diagram for the proper set-up distances for the target matt/bale, the paper frame, and your location while shooting. Note that for 3A and 3B, the angle the arrow sticks into the bale is part of the evidence to use together with the paper tear. The height of the paper frame must be at about the same height of the archer's shoulders so the arrows will be shot in a flat plane to the target bale. |
|
 |
|
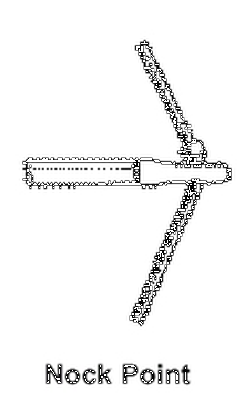
SECTION 3:SETTING THE NOCK POINT to control the vertical paper tear. You will be moving the nock point either up or down the bowstring during this process as necessary. The archer should use the same type of nock point here as will use during normal shooting. (metal, tie-on, etc.). Note that lower poiundage bows benefit from lighter nock-points, such as tie-on, compared to heavier metal nock points. |
 |
3A: Bare Shaft Tears the Paper Upwards. |
|
| The arrow flies through the paper with the point/nose down and the nock/tail high, tears the paper vertically, and lands in the bale nock-end HIGH. There may be a sideways element to the paper tear, ignore for now. In this case the NOCK POINT is too high on the bowstring. Move the NOCK POINT lower down the bowstring until the vertical tear is eliminated. The arrow will typically stick in the target in the same angle as shown here passing through the paper frame, as long as the bale is properly set only a meter behind the paper frame. | 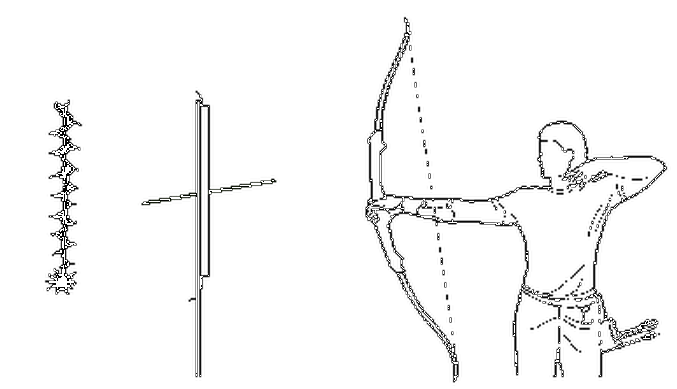 |
3B: Bare Shaft Tears the Paper Downwards. |
|
| The arrows flies through the paper with the point/nose high and the nock/tail low, tears the paper vertically, and lands in the bale nock-end LOW. There may be a sideways element to the paper tear, ignore for now. In this case, the NOCK POINT is too low on the bowstring. Move the NOCK POINT higher up the bowstring until the vertical tear is eliminated. | 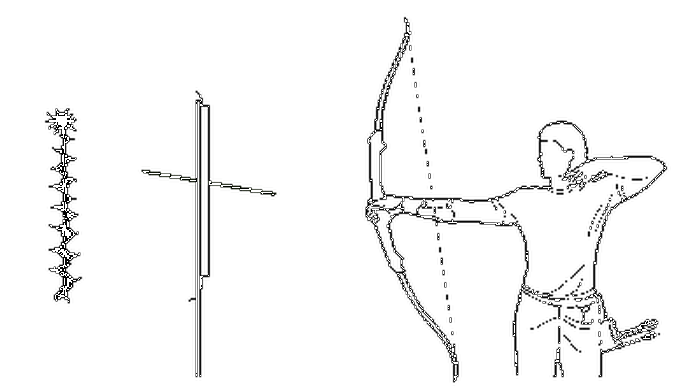 |
Verify your brace height, then adjust the NOCK POINT until the paper tear is neither up nor down. Shoot as many bare shafts as necessary to be sure of the consistency of your evidence. Each step in this process should be completed before beginning the next step.Failure to properly set nocking point will result in arrow "porpoise" flight behavior. |
|
Now To Resolve Any Left/Right Tearing In PaperRemember to use the actual appearance of the arrow in the bale to assist you in identifying left and right arrow tear. |
|
3C: Identifying A Left Paper Tear |
|
 |
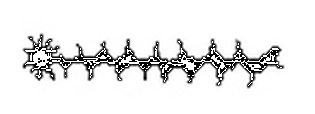
As the shaft went through the paper, the point of the bare shaft was angled to the right and the nock was to the left. The arrow in the target bale is angled so the nock is to the left of the point. In this diagram of the paper tear the point made the round tear on the right end of the tear and the nock tore the paper on the left end. |
3D: Identifying A Right Paper Tear |
|
 |
As the shaft went through the paper, the point of the bare shaft was angled to the left and the nock was to the right. The arrow in the target bale is angled so the nock is to the right of the point. In this diagram of the paper tear the point made the round tear on the left end of the tear, and the nock tore the paper on the right end. |
The paper tear should not have any vertical component, only horizontal. Return to 3A & 3B if necessary.
|
|
Section 4: Horizontal Tear Elimination |
|
Note: the following steps are different for right-hand and left-hand archers. Follow the steps that correspond to the hand you use to pull the bowstring. |
|
4A: For Right-Hand Archers |
|
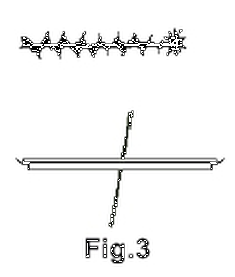 |
Figure 3 shows the LEFT TEAR, and the angle the arrow has, viewed from above the paper frame, during the tearing of the paper. The target bale is at the top of the picture but not shown here. If the tear is one to three inches wide, the shaft may be stiffened enough, by decreasing the weight in the point, shortening the arrow shaft, or by decreasing the bow draw weight. If the paper tear is greater than three inches in width, the shaft is too weak to compensate for. Select a stiffer shaft. Do not shorten the arrow excessively to the point of danger of over-drawing arrow. |
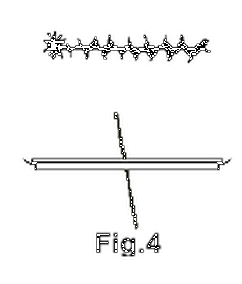 |
Figure 4 shows the RIGHT TEAR, and the angle the arrow has, viewed from above the paper frame, during the tearing of the paper. The target bale is at the top of the picture but not shown here. If the paper tear is one to three inches wide, the shaft can be weakened by increasing the weight in the point or by increasing the bow draw weight. If the paper tear is greater than three inches in width, the shaft is too stiff to compensate for. Select a weaker shaft. |
 |
The ideal paper tear is a "bullet hole", and a paper tear with less than one inch to either right or left is acceptable. |
4B: For Left-Hand Archers |
|
 |
Figure 3 shows the LEFT TEAR, and the angle the arrow has, viewed from above the paper frame, during the tearing of the paper. The target bale is at the top of the picture but not shown here.
If the paper tear is one to three inches wide, the shaft can be weakened by increasing the weight in the point or by increasing the bow draw weight. If the paper tear is greater than three inches in width, the shaft is too stiff to compensate for. Select a weaker shaft. |
 |
Figure 4 shows the RIGHT TEAR, and the angle the arrow has, viewed from above the paper frame, during the tearing of the paper. The target bale is at the top of the picture but not shown here.
If the tear is one to three inches wide, the shaft may be stiffened enough, by decreasing the weight in the point, shortening the arrow shaft, or by decreasing the bow draw weight. If the paper tear is greater than three inches in width, the shaft is too weak to compensate for. Select a stiffer shaft. Do not shorten the arrow excessively to the point of danger of over-drawing arrow. |
 |
The ideal paper tear is a "bullet hole", and a paper tear with less than one inch to either right or left is acceptable. |
SECTION 5: PLUNGER TUNING - SPRING TENSION |
|
5A. Plunger Tuning For The Right-hand Archer |
|
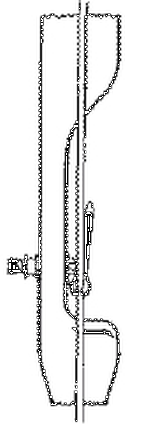
| The STIFF PLUNGER is in the center of the bow as per step 1F. With the STIFF PLUNGER, first shoot fletched arrows from 18 meters and adjust your sight as necessary to get the best group in the center of the target. You may wish to start at 10 meters to insure your arrows will be on the bale, and adjust the sight and move back until you are at 18 meters, then proceed to shoot with STIFF PLUNGER until you achieve reliable groups in the center of the bale. Then, remove STIFF PLUNGER(matchstick) and install SPRING into plunger. Adjust the plunger to a medium spring tension setting. |
|
| Adjust the plunger until the right edge of the end of the arrow shaft (@ the junction between shaft and arrow tip)is in line with the left side of the bow string. Refer to Section 1E for how to position the bow for proper viewing angle. Do not use the right edge of the arrow point! Shoot fletched arrows from 18 meters but DO NOT ADJUST THE SIGHT. Correct the flight of the arrow by adjusting the tension of the SPRING in the PLUNGER. Shoot the arrows in the same target and shoot the best group possible. If the arrows group to the left of center weaken the spring tension(usually you would rotate the plunger's tensioner Counter-ClockWise). If the arrows are to the right of center, stiffen the SPRING (rotate ClockWise). Adjust the SPRING until the group is in the center of the target. The group should be the same location as the group you shot using the STIFF PLUNGER/CENTER SHOT METHOD. For more exact tuning, go to SECTION 6. |
 |
5B. Plunger Tuning For The Left-hand Archer |
|
The STIFF PLUNGER is in the center of the bow as per step 1F. With the STIFF PLUNGER, first shoot fletched arrows from 18 meters and adjust your sight as necessary to get the best group in the center of the target. You may wish to start at 10 meters to insure your arrows will be on the bale, and adjust the sight and move back until you are at 18 meters, then proceed to shoot with STIFF PLUNGER until you achieve reliable groups in the center of the bale. |
|
| Adjust the plunger until the left edge of the end of the arrow shaft (@ the junction between shaft and arrow tip)is in line with the right side of the bow string. Refer to Section 1E for how to position the bow for proper viewing angle. Do not use the left edge of the arrow point! Shoot fletched arrows from 18 meters but DO NOT ADJUST THE SIGHT. Correct the flight of the arrow by adjusting the tension of the SPRING in the PLUNGER. Shoot the arrows in the same target and shoot the best group possible. If the arrows group to the right of center weaken the spring tension (usually you would rotate the plunger's tensioner Counter-ClockWise). If the arrows are to the left of center, stiffen the SPRING tension (ClockWise). Adjust the SPRING until the group is in the center of the target. The group should be the same as the group you shot using the STIFF PLUNGER/CENTER SHOT METHOD. For more exact tuning, go to SECTION 6. |
 |
SECTION 6: THE BEGINNING OF FINE TUNING |
|
DROP METHOD - YOU MANY NEED TO REPEAT THIS SECTION MORE THAN ONCE TO ACHIEVE TUNE. This step is also known as "walk-back" tuning. |
|
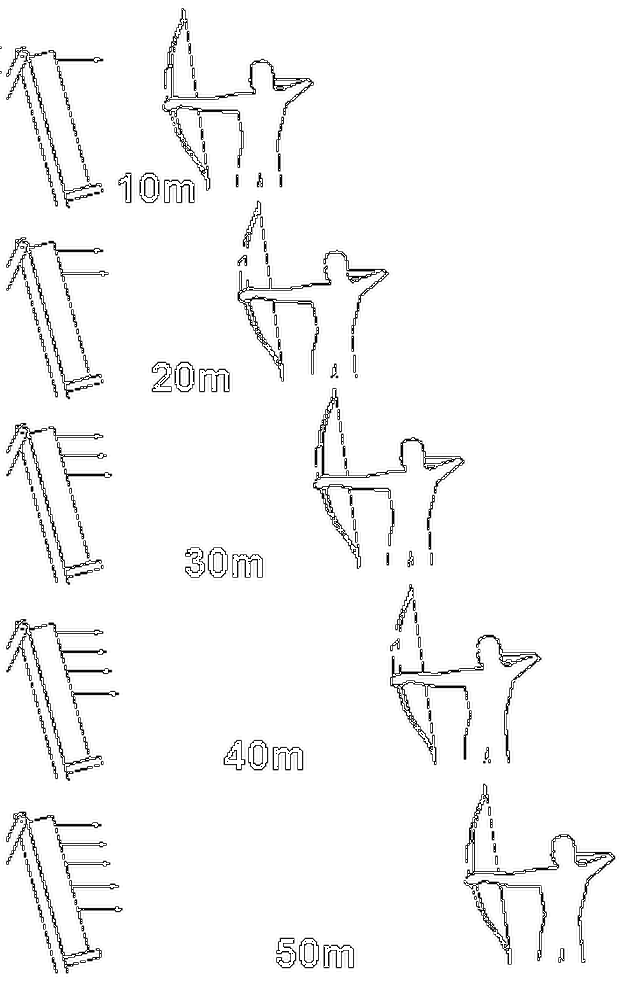 |
Pick a mark near the top of the target matt/bale. Shoot from 10 meters and adjust the sight if necessary. If you are not sure of your ability to release each arrow uniformly then you should shoot an end of 3 arrows at each distance to create a grouping effect each time. Your goal is to create a reliable pattern. Shoot each end then move back 5 meters at a time and continue to shoot at the same mark at the top of the target. DO NOT ADJUST THE SIGHT! The arrows should impact lower down the target as you move away from the target. Work your way back as far as possible without the arrow passing beneath the target bale. This is usually around 40 to 50 meters for most bows. If the arrows drift to either right or left of center as you move back, more tuning is required, so go to SECTION 7. |
| If the arrows fall in a straight line, the tune is good. Section 7 is not needed, and Section 8 may not be necessary but review it anyway. |
|
6B. PATTERN ANALYSIS OF THE FALLING GROUPS |
||
| FOR LEFT-HAND ARCHERS If the arrows fall off to the left side of center during 6A, stiffen the tension on the SPRING IN THE PLUNGER (rotate CW - clockwise - see diagram below) until the arrows stay in the center line. If the arrows fall to the right side of center, weaken the tension on the SPRING IN THE PLUNGER (rotate CCW - counter-clockwise) until the arrows stay in the center line. |
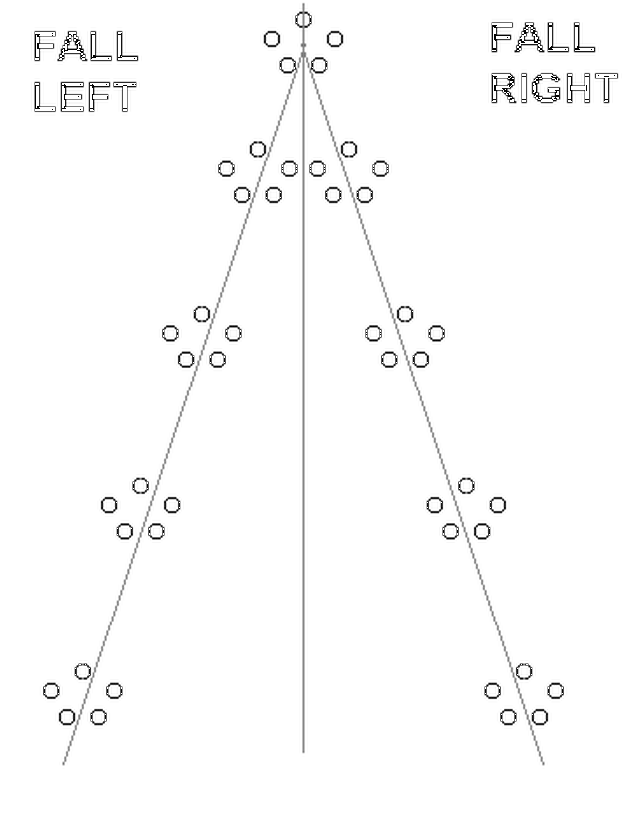 |
FOR RIGHT-HAND ARCHERS If the arrows fall off to the left side of center during 6A, weaken the tension on the SPRING IN THE PLUNGER (rotate CCW - counter-clockwise) until the arrows stay in the center line. If the arrows fall to the right side of center, stiffen the tension on the SPRING IN THE PLUNGER (rotate CW - clockwise - see diagram below) until the arrows stay in the center line. |
 |
NOTE: Approximately 1/4 turn (90 degrees) of the plunger will result in arrows moving about 4 inches at 40 meters. Note and record the effect YOUR plunger has so that you will be able to make quick and accurate adjustments in your tuning process. | |
SECTION 7: TUNING FOR PERFECTION |
||
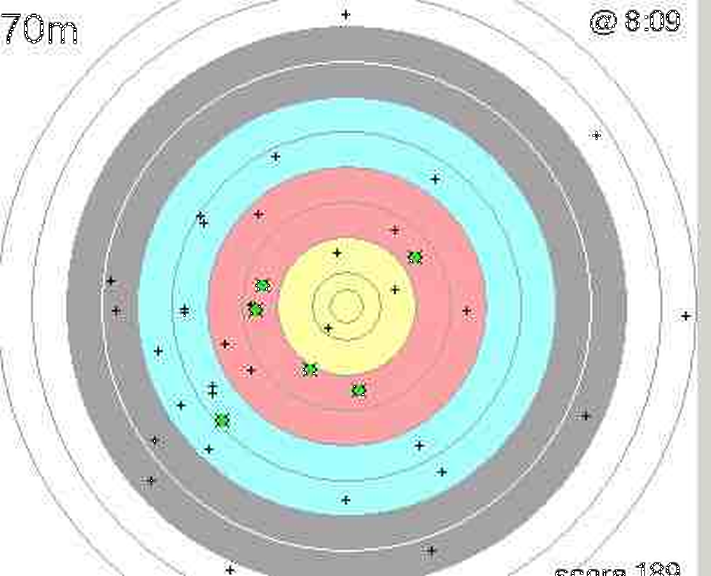
| This is the beginning of "true" fine tuning. The fine tuning can be done during normal practice but requires consistency to be most effective. Choose your normal competitive distance: 70 meters, for example. Shoot 6 ends of 6 arrows, and keep a chart of the groups. There are numerous applications for android/iOS phones that will let you score 6 arrows and rack them with comments. An example is shown below. Stiffen the plunger (CW) about 1/2 turn. Shoot another 6 ends of 6 arrows. Make a new chart for this set, and write on it, "ONE, 1/2 turn CW". Again, stiffen the plunger another 1/2 turn CW, shoot, chart, mark "TWO, 1 full turn CW", and so on. It is very important to keep track of the total 1/2 turns, and evaluate each group for a TREND of grouping. When you see it begin to open up the group, and record the total turns. RETURN THE SPRING TENSION BACK TO WHERE YOU STARTED. Now go the other direction on the turns, weaken the plunger by 1/2 turn (CCW), shoot 6 ends of 6 arrows, plot, record, repeat until the group opens up. REVIEW ALL THE CHARTS and choose the best group. Set your plunger spring tension to that chart's "turns". If there is time and patience on your part, you can repeat the above exercise using 1/4 and 1/8 turns. This will result in the best tune for you, on this day. Many good archers will repeat this process again on other days, and routinely over time, such as monthly. As their release improves, the tune will change. The release is the single largest variable of "the tune" that archers strive to make as consistent as possible. |
||
 |
||
| For more useful target archery information, please visit the A State Archery Association's website |
TAKES PERSISTENCE! |
Copyright 2001-2016, Rick Stonebraker |